Guide
Table of contents
- Prerequisites
- Configure ADO Backlog
- Configure ServiceNow DevOps Change
- Configure DevOps Performance Analytics Jobs
- Configure Application Services Change Group
- Create ServiceNow DevOps App
- Create ServiceNow DevOps Admin User
- Create ServiceNow DevOps Admin Credential
- Configure ServiceNow DevOps Integration User
- Create ServiceNow DevOps Connection
- Create DevOps GitHub Tool
- Create DevOps ADO Tool
- Check Service Connections
- Configure Pipeline
- Approve Code Change
Prerequisites
Install ServiceNow DevOps Change Velocity
ServiceNow DevOps Change Velocity helps Cloud Native Teams define Change Approval policies for code changes and preventing high risk changes to deployment environments. Leverage your toolchain data in approvals to completely automate the change approval process. Installation is as follows:
-
Login to your SN Instance as Administrator
-
Navigate to the System Definition > Plugins and install or activate the following plugins:
Plugin Name Plugin ID DevOps Change Velocity V1.33.3 sn_devops_chgvlcty
Install ServiceNow DevOps Config
ServiceNow DevOps Config helps Cloud Native Teams define advanced validation rules for comparing configuration changes against defined baselines and preventing unauthorised changes to deployment environments. Use the built-in Change Approval Workflows to completely automate the change approval process. Installation is as folows:
-
Login to your SN Instance as Administrator
-
Navigate to the System Definition > Plugins and install or activate the following plugins:
Plugin Name Plugin ID DevOps Config V1.0.3 sn_devops_configDevOps Config Insights V1.0.3 sn_devops_config_iDevOps Config Policy Content Pack V1.0.3 sn_devops_config_pDevOps Config Exporter Content Pack V1.0.3 sn_devops_config_eConfiguration Data Management V1.0.0 sn_cdmContext Menu Component V1.0.0 sn_cdm_ctx_menuPolicy as Code Engine V1.0.0 sn_pace
Configure ADO Backlog
Create Some ADO Work Items
-
Sign In to Azure DevOps
-
Select the Boutique Project (e.g.
cassandra) you configured earlier. -
Navigate to
Boardsand create a couple ofWork Items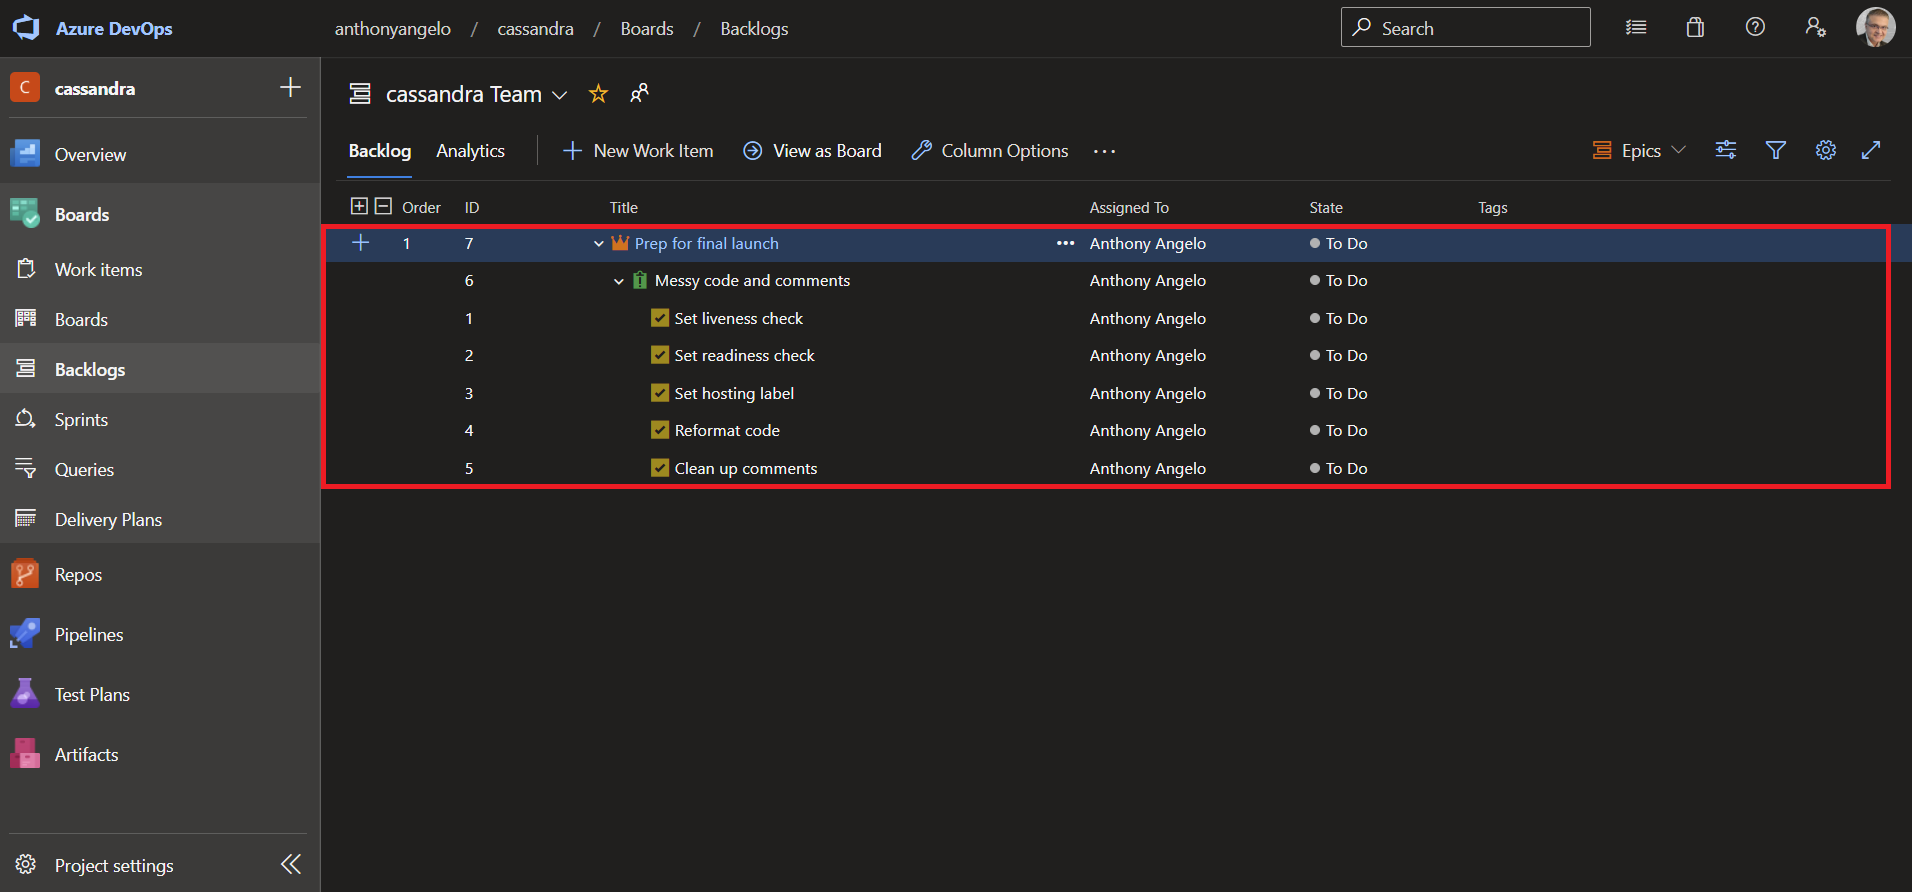
NOTE: As a best coding practice, developers should set the Git commit message to one of these Work Items relating the code change to the Azure Boards work item.
Connect GitHub with Azure Boards
-
Sign In to Azure DevOps
-
Select the Boutique Project (e.g.
cassandra) you configured earlier. -
Navigate to
Project Settings > Boards > GitHub connectionsand press theConnect your GitHub accountbutton. -
Enter your GitHub password if prompted.
-
Select the GitHub organization that you want to connect to Azure Boards (e.g. YOUR GITHUB USER ID)
-
Select the GitHub repository you want to use with your Azure Boards. (e.g. YOUR GITHUB USER ID/cassandra)
-
Press the
Approve, Install & AuthorizeButton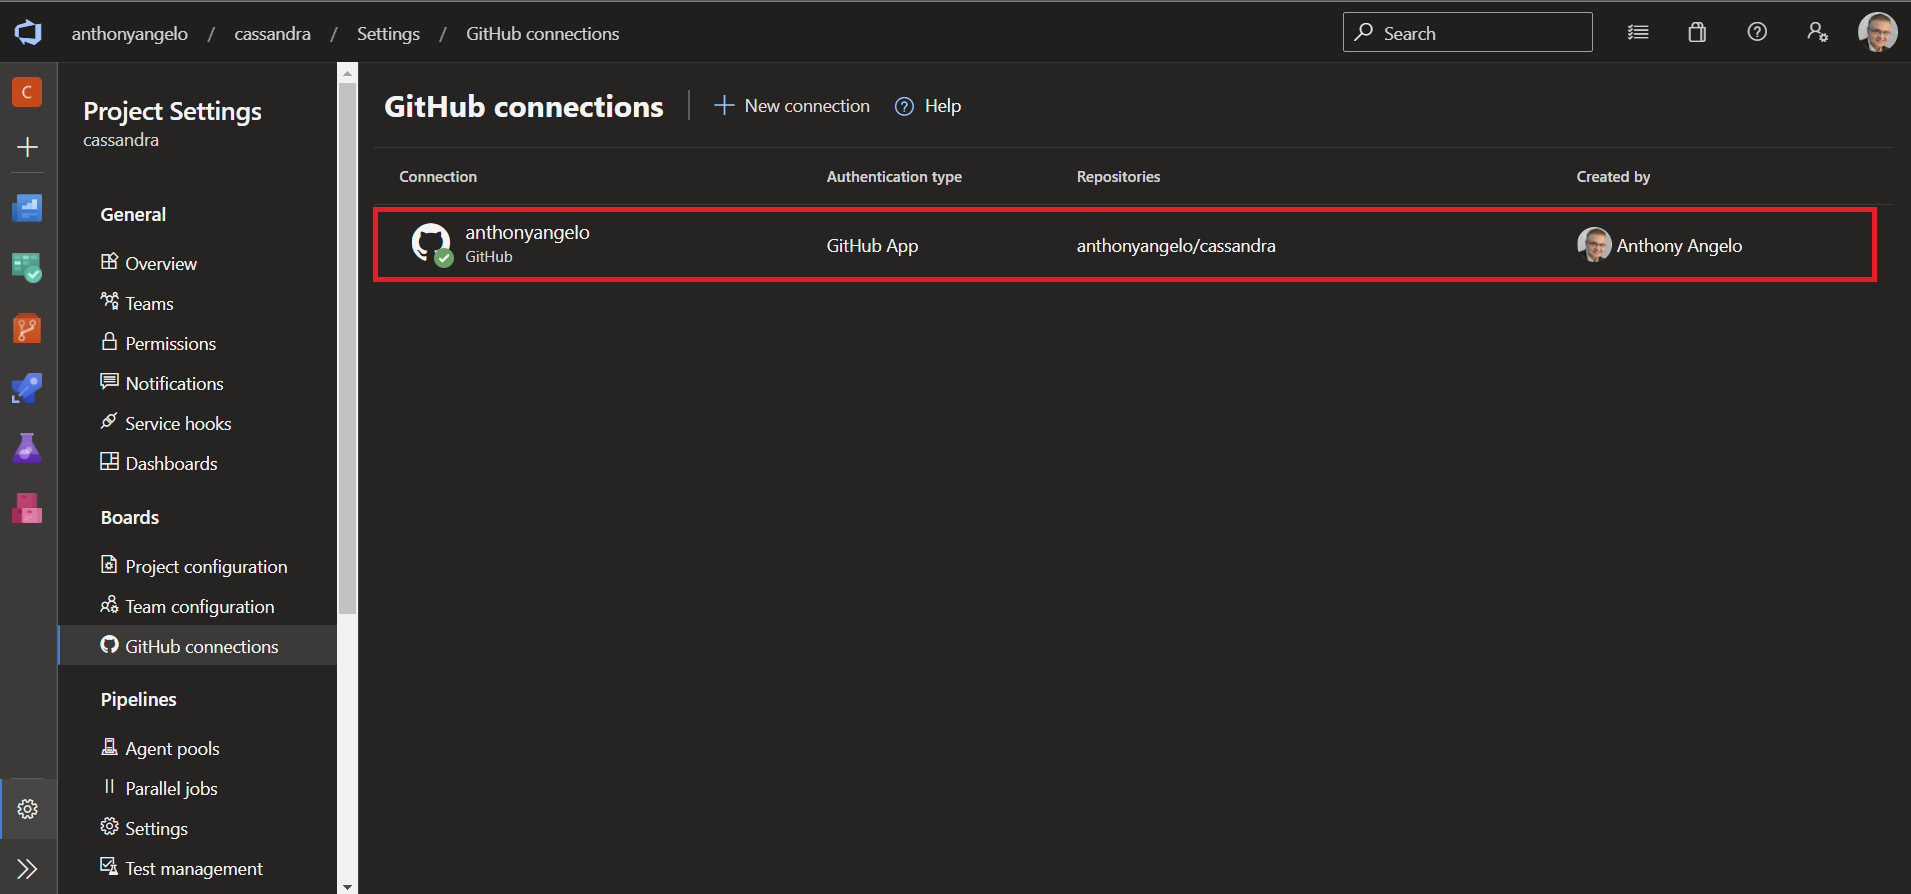
-
At this point, all commits in Git using the Azure Boards Work Item notation (e.g. AB#123) will be propagated to the relevant Work Item.
NOTE: For more information on linking Git commits to Azure Boards see the Azure Devops Documentation
Configure ServiceNow DevOps Change
Configure DevOps Performance Analytics Jobs
-
Login to your NOW Instance as Administrator
-
Navigate to Performance Analytics > Data Collector > Jobs
-
Search for Jobs where Name =
*DevOps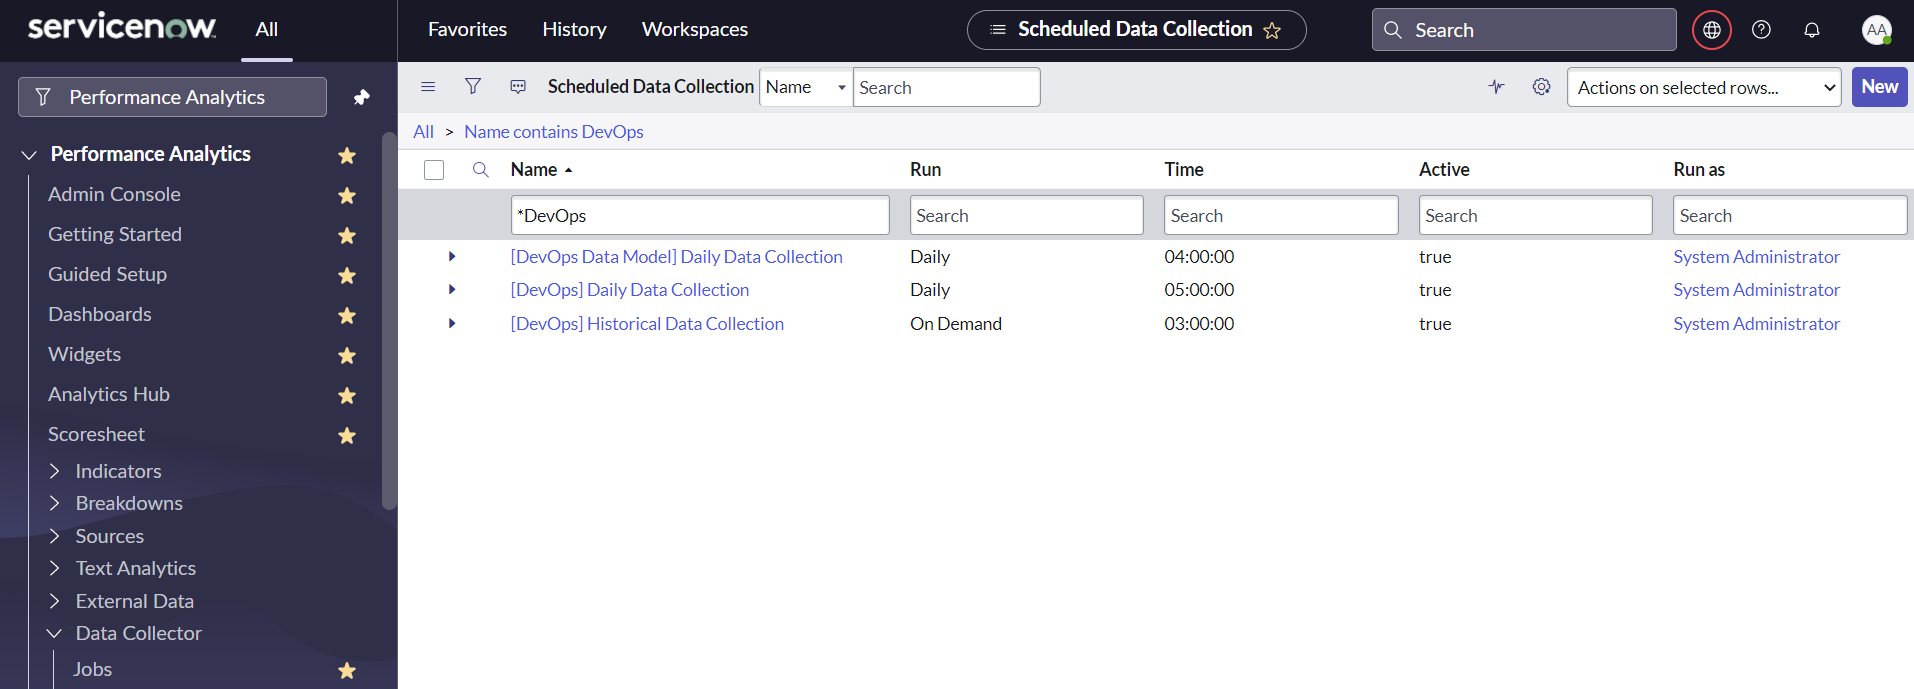
-
For each Job, set the fields as follows:
Field Value Active trueRun as System AdministratorNOTE: You will have to switch application scope from
GlobaltoDevOps Data ModelorDevOps Insightsaccordingly to make changes to Jobs.
Configure Application Services Change Group
-
Login to your NOW Instance as Administrator
-
Navigate to Configuration > Application Services
-
For all Application Services under change control, set the Change Group field to the relevant group (e.g.
Team Boutique)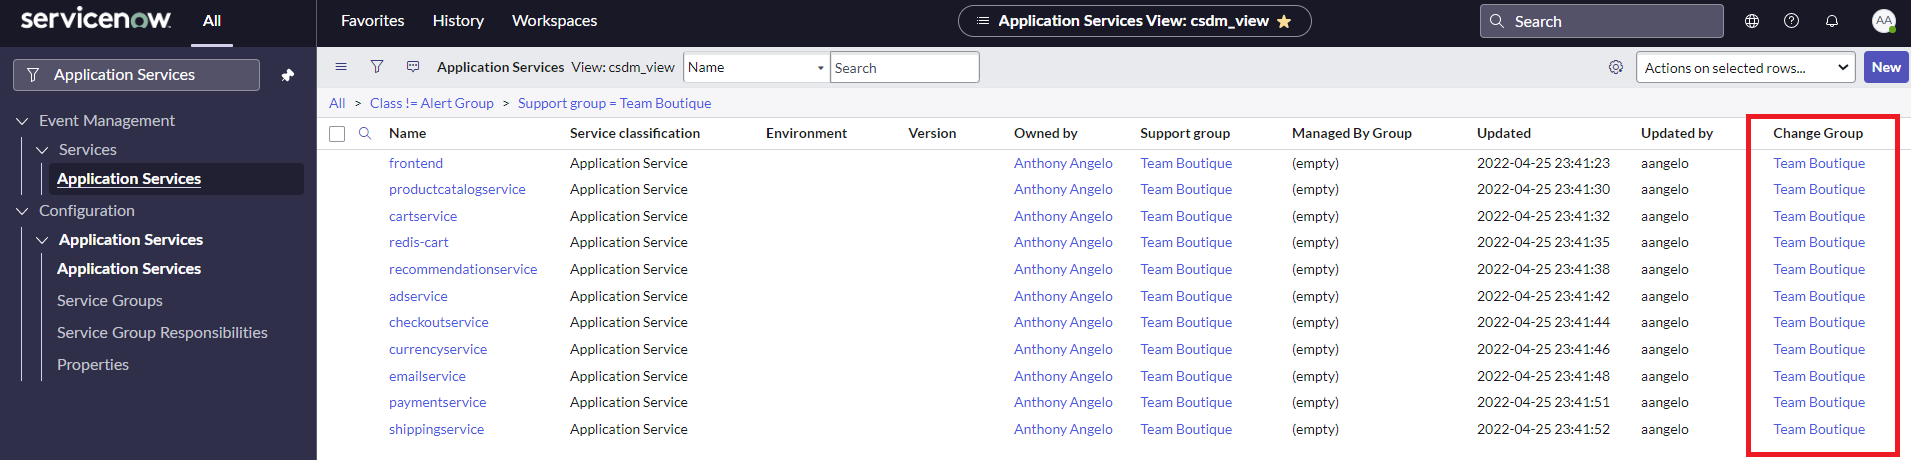
Create ServiceNow DevOps App
-
Login to your NOW Instance as Administrator
-
Navigate to DevOps > Create App
-
Create an App as follows:
Field Value Application Name Boutique App
Create ServiceNow DevOps Admin User
-
Login to your NOW Instance as Administrator
-
Navigate to User Administration > Users
-
Create an admin user as follows:
Field Value Username YOUR DEVOPS ADMIN USER NAME (e.g. devops)Password YOUR DEVOPS ADMIN USER PASSWORD Roles admin -
Press Submit Button
Create ServiceNow DevOps Admin Credential
-
Login to your NOW Instance as Administrator
-
Navigate to Connections & Credentials > Credentials
-
Create a Basic Auth Credential as follows:
Field Value Name YOUR DEVOPS ADMIN USER CREDENTIAL NAME (e.g. devops)User Name YOUR DEVOPS ADMIN USER NAME (e.g. devops)Password YOUR DEVOPS ADMIN USER PASSWORD -
Press Submit Buttom
Configure ServiceNow DevOps Integration User
-
Login to your NOW Instance as Administrator
-
Navigate to User Administration > Users
-
Locate the User ID:
devops.integration.user -
Update User as follows:
Field Value Password YOUR DEVOPS INTEGRATION USER PASSWORD -
Press Update Button
Create ServiceNow DevOps Connection
-
Login to your NOW Instance as Administrator
-
Navigate to Connections & Credentials > Connections & Credentials Aliases
-
Click on the CreateDevOpsTool alias
-
Under the Connections Tab create a new Connection
-
Create a New Connection & Credential Alias as follows:
Field Value Name YOUR SERVICENOW CONNECTION NAME(e.g. devops)Credential YOUR DEVOPS ADMIN USER CREDENTIAL NAME (e.g. devops)Connection URL YOUR SERVICENOW URL (e.g. https://srecon22.service-now.com) -
Press Submit Button
Create DevOps GitHub Tool
-
Login to your NOW Instance as Administrator
-
Navigate to DevOps > Tools > Create New
Field Value Name YOUR ADO TOOL NAME (e.g. MyGitHub)Tool Integration GitHubTool Url GITHUB API URL (e.g. https://api.github.com)Credential Type Basic AuthTool Username YOUR GITHUB ID Tool Password / Access Token YOUR GITHUB PAT -
Press Submit Button
-
Press Discover Button
-
Select Repositories Tab
-
Select the cassandra repository
-
Set Track file changes =
True -
Press the Configure Button and configure as follows:
Field Value Integration User DevOps Integration UserIntegration user password YOUR DEVOPS INTEGRATION USER PASSWORD -
Press Send Button
NOTE: The provided Tool URL and credentials will be used to create a Webhook from the Git Repo to ServiceNow.
Create DevOps ADO Tool
-
Login to your NOW Instance as Administrator
-
Navigate to DevOps > Tools > Create New
Field Value Name YOUR ADO TOOL NAME (e.g. MyAdo)Tool Integration Azure DevOpsTool Url YOUR ADO ORG URL (e.g. https://dev.azure.com/YOURORG/YOURREPO)Tool Username YOUR ADO TOKEN NAME Tool Password / Access Token YOUR ADO TOKEN VALUE -
Press Submit Button
-
Press Discover Button
-
Select Repositories Tab
-
Select the cassandra repository
-
Set the Track field to
true -
Press the Configure Button and configure as follows:
Field Value Integration User DevOps Integration UserIntegration user password YOUR INTEGRATION USER PASSWORD -
Press Send Button
NOTE: The provided Tool URL and credentials will be used to create 2 Service Connections in Azure DevOps
-
Select Pipelines Tab
-
For all Pipelines, set the App field to
Boutique App -
For all Pipelines, set the Track field to
true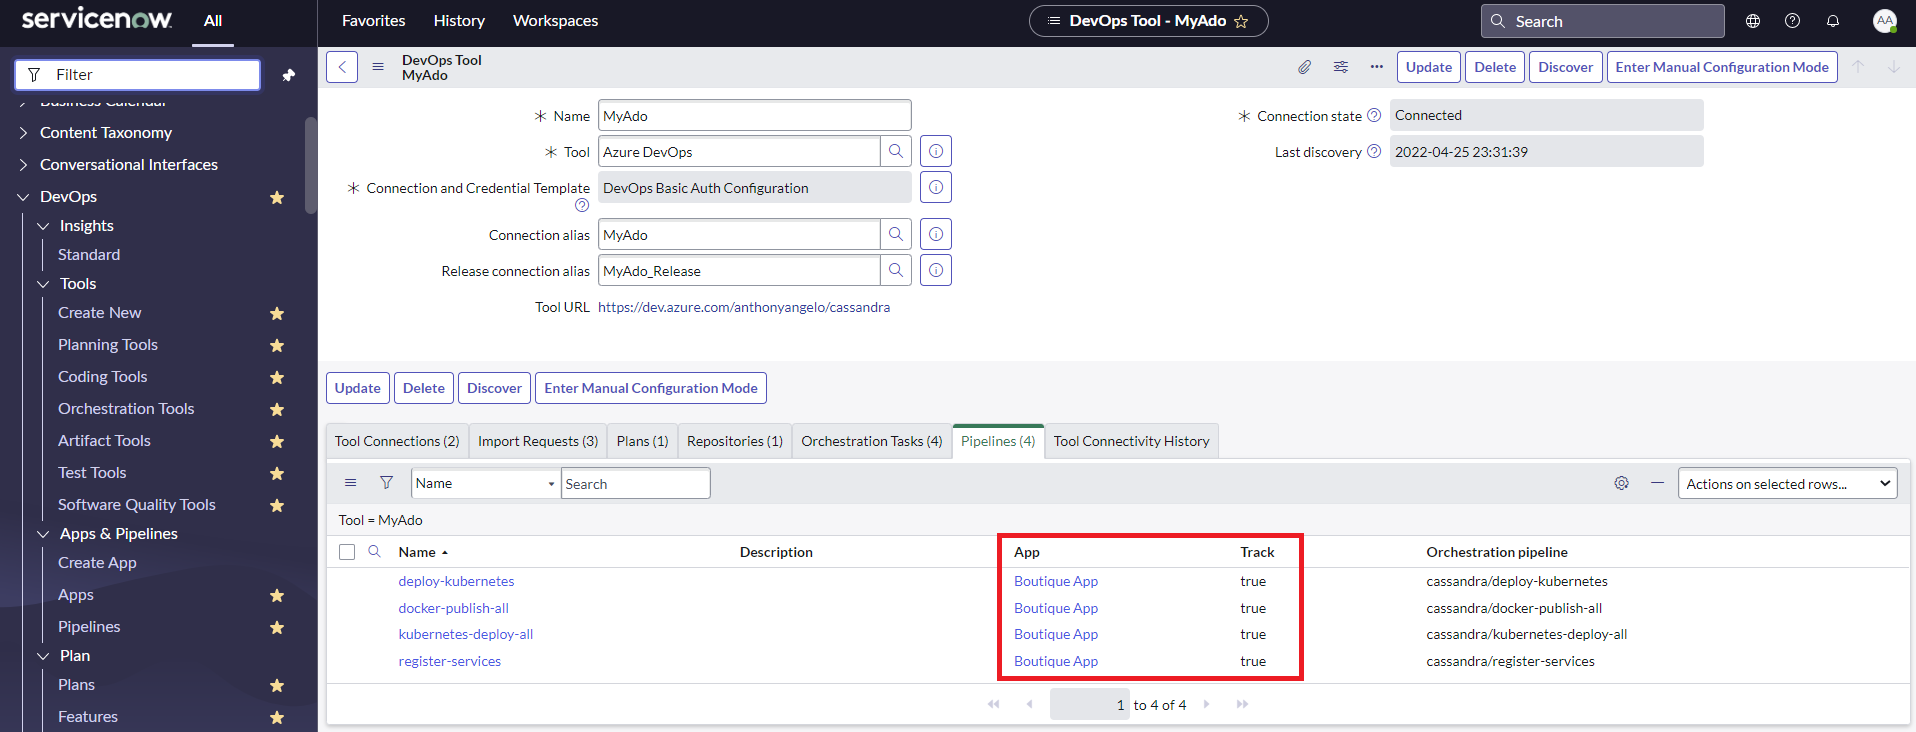
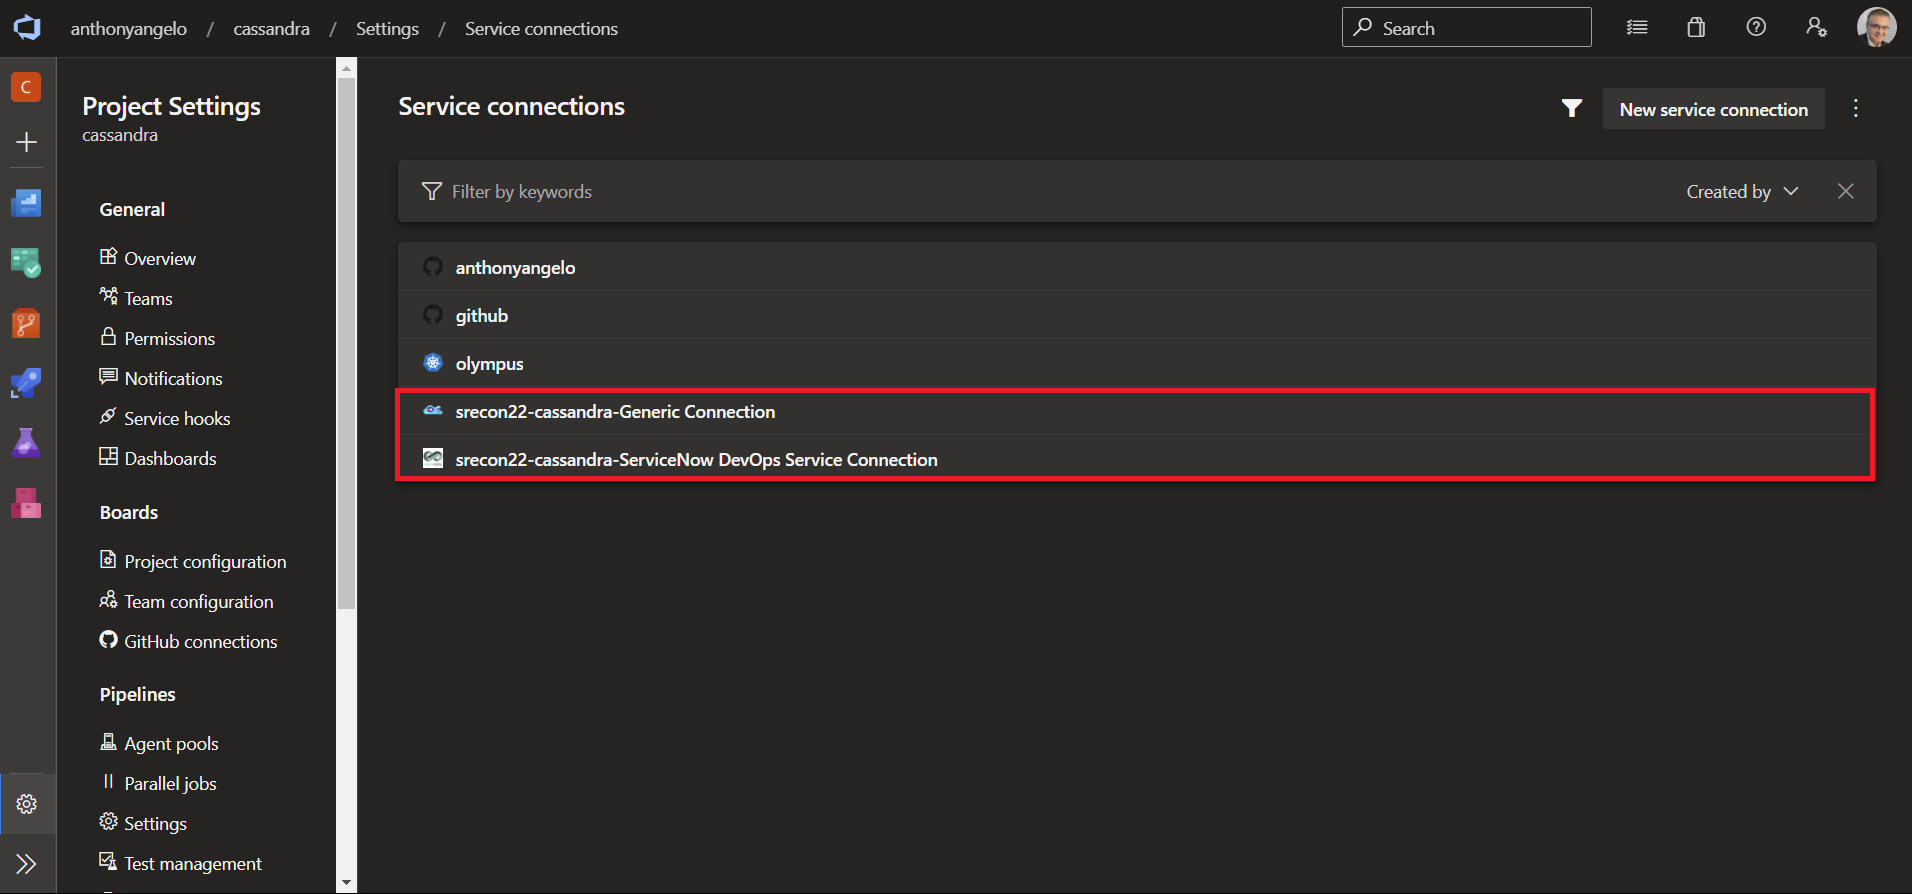
Check Service Connections
-
Sign In to Azure DevOps
-
Select the Boutique Project (e.g.
cassandra) you configured earlier. -
Navigate to
Project Settingsand press theService Connectionsbutton. -
Locate the 2 ServiceNow Service Connections you created earlier from ServiceNow.
Configure Pipeline
-
Sign In to Azure DevOps
-
Select the Boutique Project (e.g.
cassandra) you configured earlier. -
Navigate to
Pipelines > Alland create anazure-pipelinesfolder, if it does not exist. -
Navigate to the
azure-pipelinesfolder and pressCreate Pipeline -
For the
Where is your code?prompt, selectGitHub -
For the
Select a repositoryprompt, select your GitHub Repository. -
Press
Approve and Install -
Enter your GitHub password if prompted.
-
At the
Configure your pipelineprompt, selectExisting Azure Pipelines YAML file -
At the
Select an existing YAML fileprompt, set fields as follows:Field Value Branch mainPath /azure-pipelines/kubernetes-deploy.yml -
Press
Continueto review your pipeline YAML. -
Un-Comment the
DevOps_ChangeStage and set all occurences ofconnectedServiceNameto your ServiceNow Service Connection name.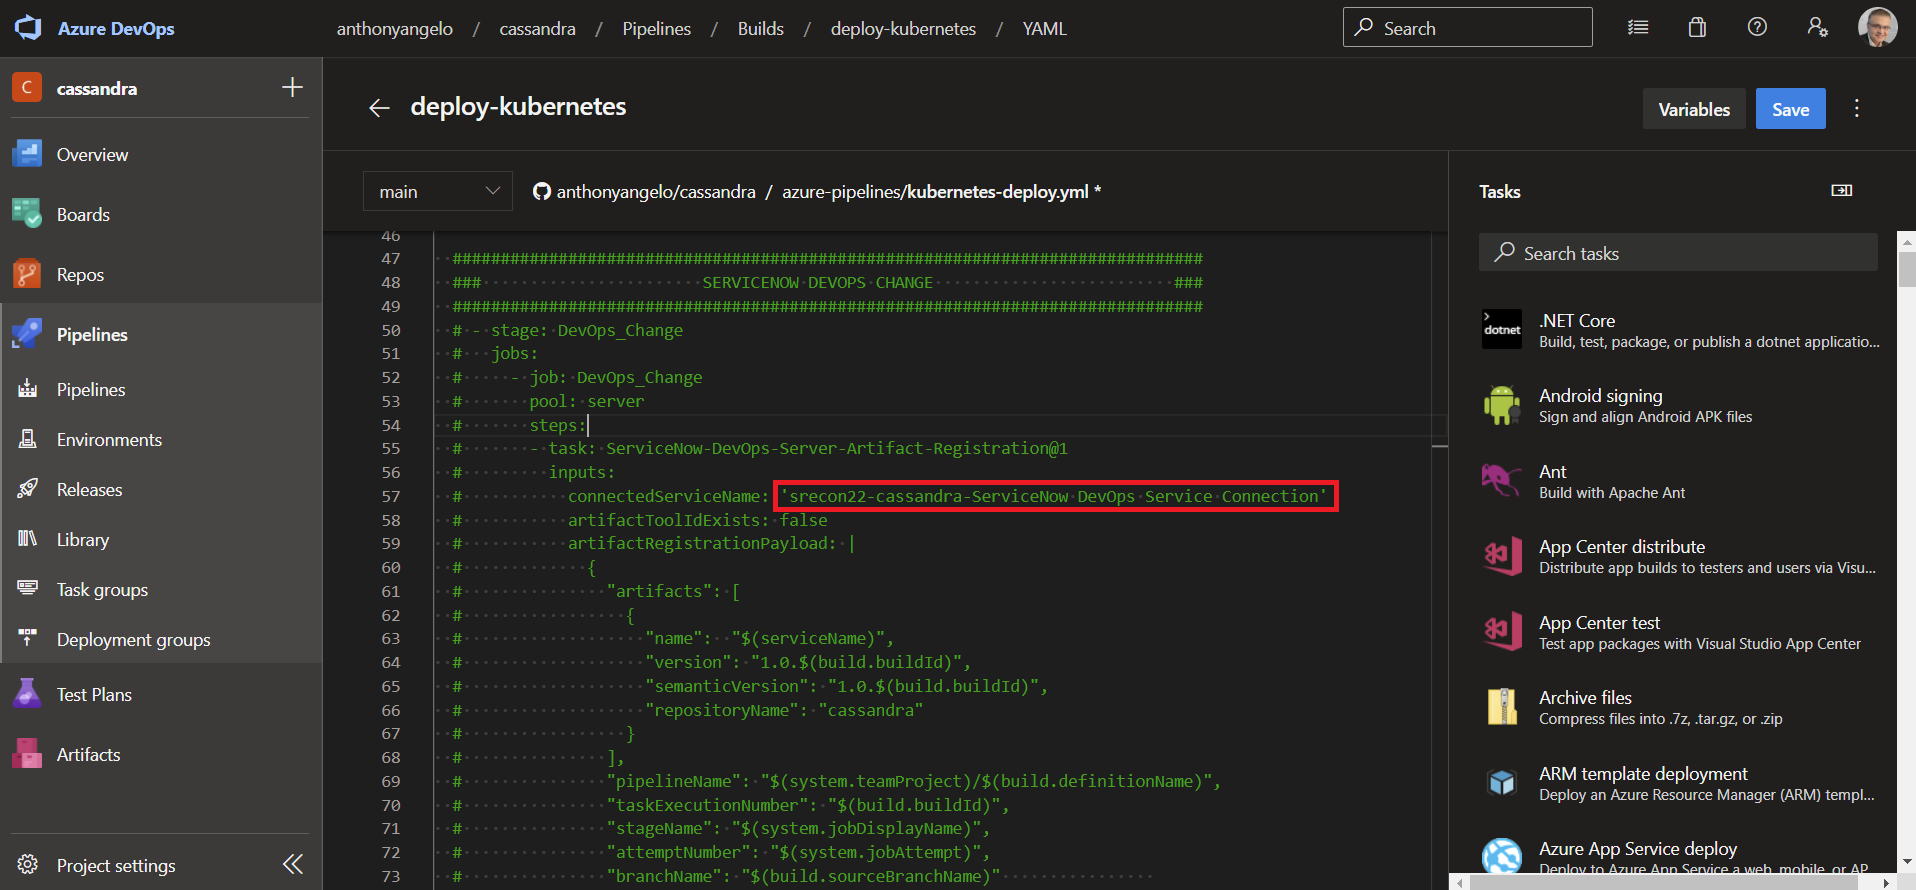
-
Create the following Pipeline Variables:
Name Value Keep this value secret Let users override this value when running this pipeline REPO_USERNAME YOUR DOCKER HUB ID False True REPO_PAT YOUR DOCKER PAT True True REPO_PREFIX YOUR DOCKER HUB ID False True SERVICE_NAME YOUR SERVICE NAME (e.g. frontend)False True SERVICE_NAMESPACE cassandraFalse True -
Using the
RunButton, selectSave Pipeline
Approve Code Change
Make a Code Change
-
Sign In to GitHub
-
Select the Boutique Project (e.g.
cassandra) you configured earlier. -
Locate the
src/adservice/src/main/java/hipstershop/AdService.javafile -
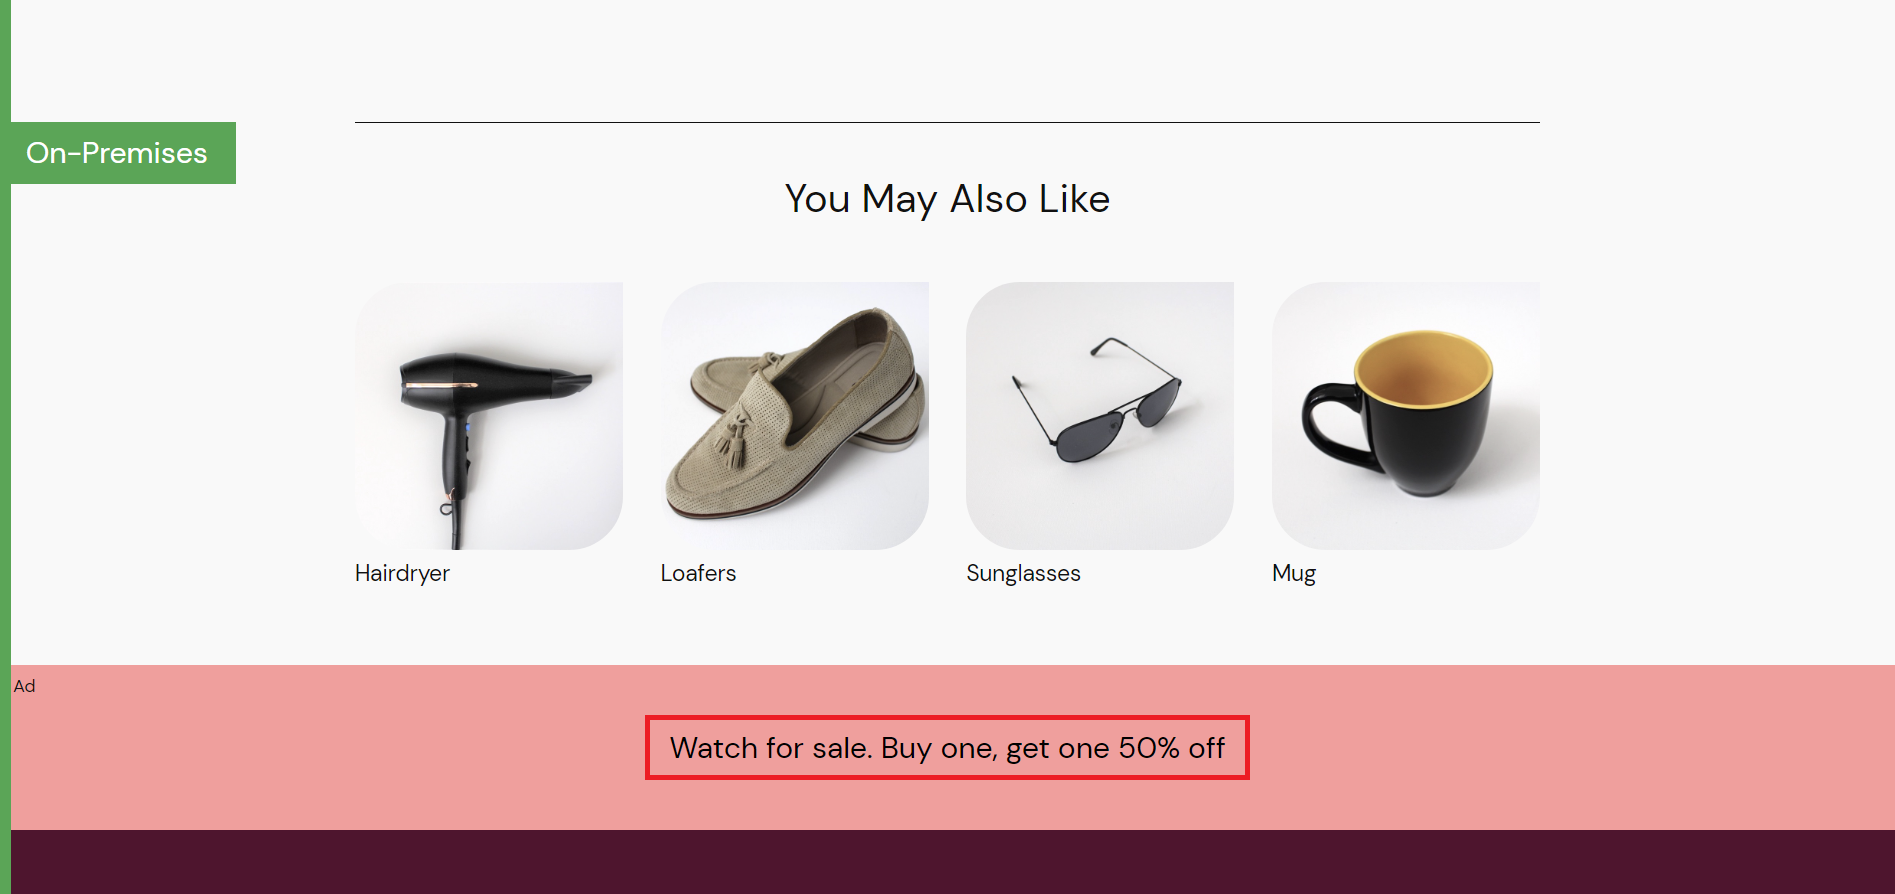
Update the
createAdsMapmethod for any product to display different discount text as follows: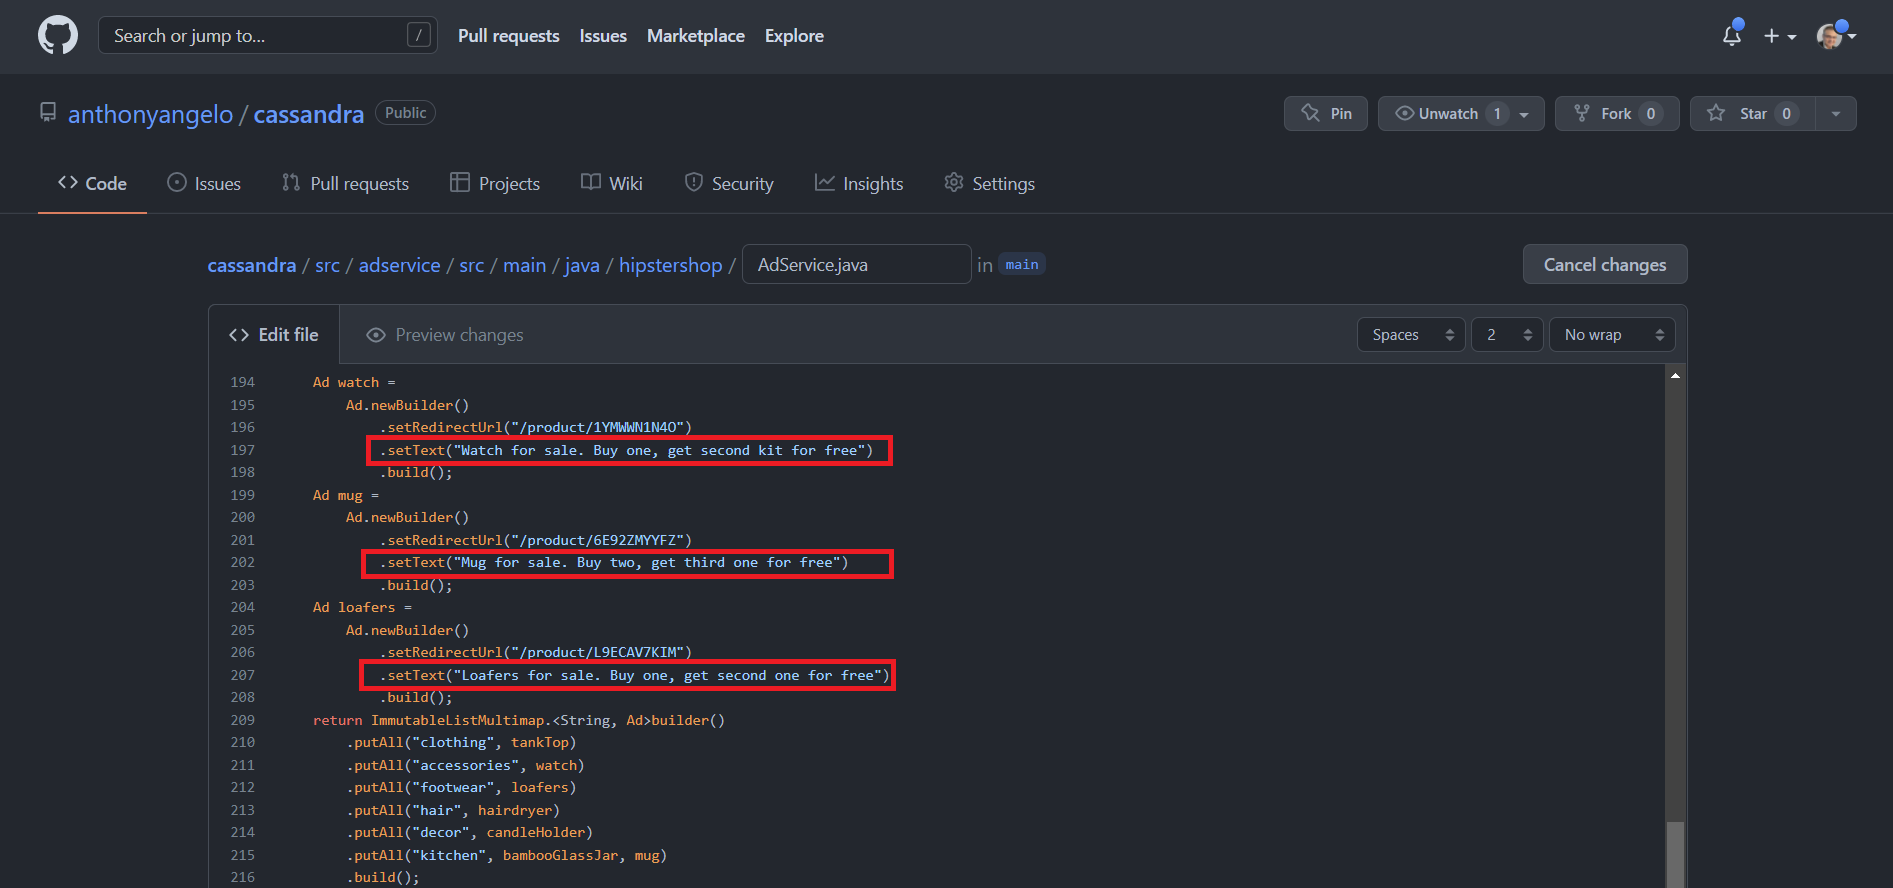
-
Commit changes using the Azure Boards Work Item notation (e.g. AB#123)

Trigger the Azure DevOps Pipeline
-
Sign In to Azure DevOps
-
Select the Boutique Project (e.g.
cassandra) you configured earlier. -
Navigate to
Pipelines > Alland select theazure-pipelinesfolder. -
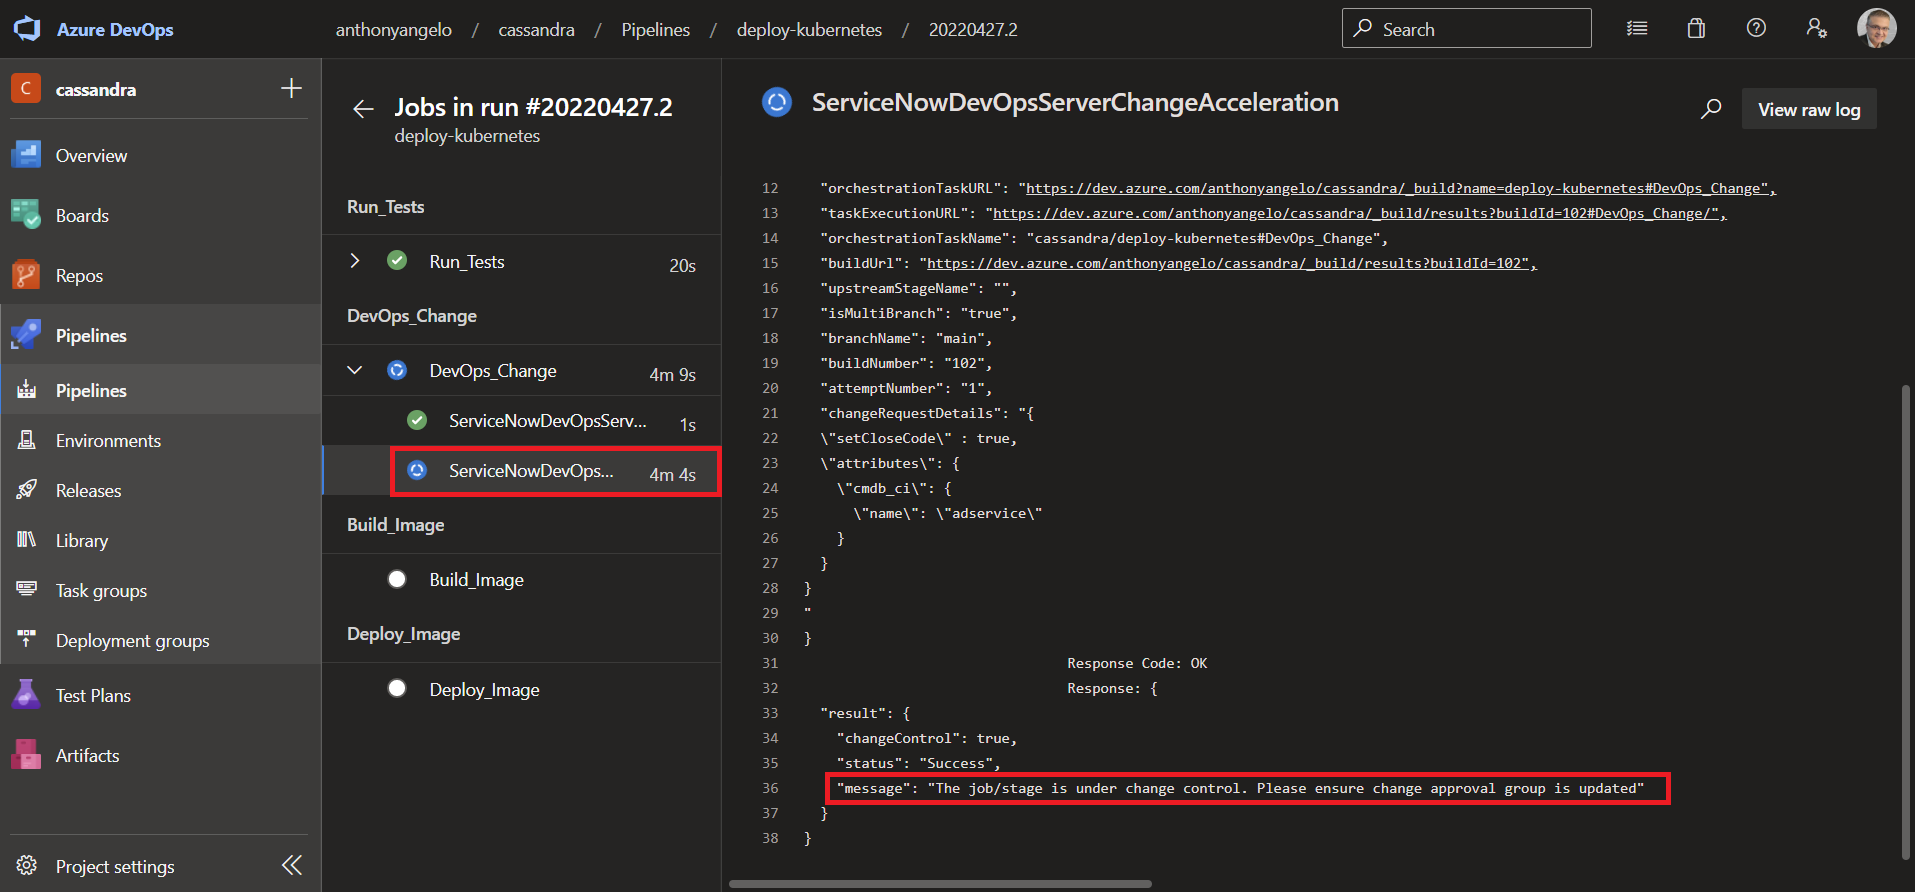
Run the
kubernetes-deployPipeline and set parameters as follows:Parameter Value SERVICE_NAME adservice -
Notice that the pipeline has been paused, pending change control approval.
Approve Change in ServiceNow
-
Login to your NOW Instance as Administrator
-
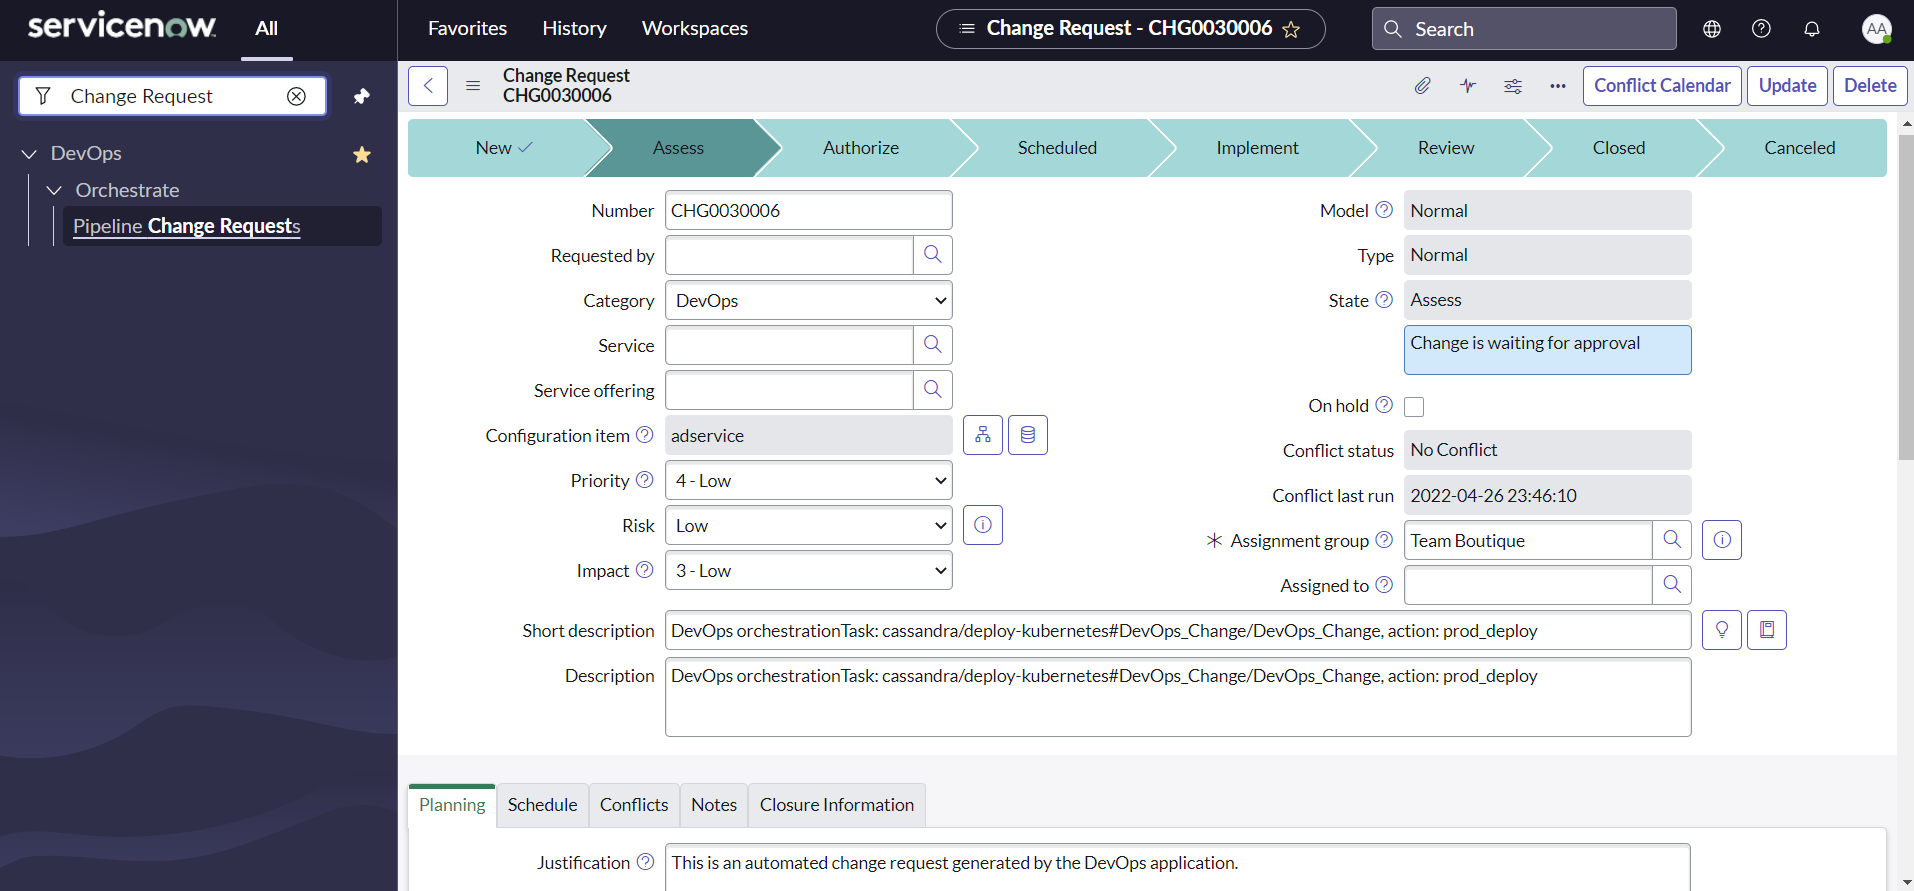
Navigate to DevOps > Orchestrate > Pipeline Change Requests

-
Select Change and review all relevant items.
-
Click on the
ApproversTab -
Hover over Approver and right-click
Approvethe item. -
Press the Implement Button
NOTE: Notice how the Azure DevOps Pipeline has been un-paused.
-
Browse to the EXTERNAL-IP to view the Boutique Application and look for the updated AdService discount text.