Prerequisites
Table of contents
- Introduction
- Request a ServiceNow Instance
- Get some Accounts
- Setup your Workstation
- Deploy Azure Kubernetes
- Configure your Projects
- Deploy Boutique
Introduction
This site provides documentation, training, and other notes for implementing the Cloud Native Service Operations for ServiceNow Solutions. The instructions provided are geared towards developers and assume a basic level of competency and familiarity with the tools listed. Following is a list of prerequisite tools, configuration steps, and accesses needed before implementing the Cloud Native Service Operation solutions.
Request a ServiceNow Instance
Request ServiceNow Instance
ServiceNow (SN) is a leading Cloud Computing platform built to help companies manage Digital IT, Employee, Customer and Creator Workflows for the Enterprise. You will need a ServiceNow instance to implement these solutions and learn. Procedure is as follows:
- You probably allready own a development instance, or you can request a personal developer instance from:
- ServiceNow employees can request a new internal instance from:
NOTE: Create yourself a User Account with an Administrator
adminRole
Get some Accounts
Get a GitHub Account
GitHub is the leading Source Code hosting platform for Version Control & Collaboration for your distributed teams. Cloud Native teams use Git to store both code and declarative descriptions of the infrastructure. Procedure is as follows:
-
You probably allready have a GitHub Account, or you can sign-up for one as follows:
- Browse to GitHub and
Sign Upfor your own account.
- Browse to GitHub and
Get an Azure Account
Azure is a public cloud computing platform from Microsoft with solutions including Infrastructure as a Service (IaaS), Platform as a Service (PaaS), and Software as a Service (SaaS) that can be used for services such as analytics, virtual computing, storage, networking, and much more. It can be used to replace or supplement your on-premise servers. Procedure is as follows:
-
You probably allready have an Azure Account, or you can request one as follows:
- Browse to Azure and get a
Free account
- Browse to Azure and get a
Get a Docker Hub Account
Docker Hub is the leading Docker Public Registry for finding and sharing Docker Container Images with your distributed teams. Cloud Native teams use automated build proceses to push freshly built Docker Images to Docker Hub and to deploy them to Kubernetes. You will need a Docker Hub account to store your Docker Images. Procedure is as follows:
-
You probably allready have a Docker Hub Account, or you can register for one as follows:
- Browse to Docker Hub and
Registerfor your own account.
- Browse to Docker Hub and
Setup your Workstation
Install WSL Ubuntu for Windows
Windows Subsystem for Linux (WSL) is a compatibility layer for running Linux binary executables (in ELF format) natively on Windows 10, Windows 11, and Windows Server 2019. For Windows environments we recommend using WSL for all Bash commands. Installation is as follows:
-
Start a PowerShell
-
Install WSL for Windows
wsl --install
NOTE: For more detailed instructions consult the Microsoft WSL for Windows Install Docs
- Start a Bash Shell
Create SSH Keys
SSH (Secure Shell) keys are acces credentials that are used in the SSH protocol and are foundational to modern Infrastructure-as-a-Service platforms such as AWS, Google Cloud, and Azure. Procedure is as follows:
-
Start a Bash Shell
-
Create a Service Account SSH Key as follows:
ssh-keygen -t rsa -b 4096 -C "olympus@demo.com" -f $HOME/.ssh/olympusCommand prompts and output are as follows:
Generating public/private rsa key pair Enter file in which to save the key (~/.ssh/olympus): Enter passphrase (empty for no passphrase): Your identification has been saved in ~/.ssh/olympus Your public key has been saved in ~/.ssh/olympus.pub -
Create a Personal SSH Key as follows:
ssh-keygen -t rsa -b 4096 -C "YOUR EMAIL ADDRESS"Command prompts and output are as follows:
Generating public/private rsa key pair Enter file in which to save the key (~/.ssh/id_rsa): Enter passphrase (empty for no passphrase): Your identification has been saved in ~/.ssh/id_rsa Your public key has been saved in ~/.ssh/id_rsa.pub -
Set SSH Permissions
chmod -R 700 ~/.ssh chmod 644 ~/.ssh/authorized_keys -
Safeguard both SSH Keys
Install Azure CLI for WSL Ubuntu
The Azure command-line interface (Azure CLI) is a set of commands used to create and manage Azure resources. The Azure CLI is available across Azure services and is designed to get you working quickly with Azure, with an emphasis on automation. If you have a Windows Workstation with WSL Ubuntu, the installation is as follows:
-
Start a Bash Shell
-
Get Updates
sudo apt-get update sudo apt-get install ca-certificates curl apt-transport-https lsb-release gnupg -
Download and install the Microsoft signing key
curl -sL https://packages.microsoft.com/keys/microsoft.asc \ | gpg --dearmor \ | sudo tee /etc/apt/trusted.gpg.d/microsoft.gpg > /dev/null -
Add the Azure CLI software repository
AZ_REPO=$(lsb_release -cs) echo "deb [arch=amd64] https://packages.microsoft.com/repos/azure-cli/ $AZ_REPO main" \ | sudo tee /etc/apt/sources.list.d/azure-cli.list -
Install the Azure CLI
 sudo apt-get update
 sudo apt-get install azure-cli
NOTE: For more detailed instructions consult the Microsoft Azure CLL Docs for WSL on Ubuntu
-
Test Login
az login
Install Azure CLI for macOS
The Azure command-line interface (Azure CLI) is a set of commands used to create and manage Azure resources. The Azure CLI is available across Azure services and is designed to get you working quickly with Azure, with an emphasis on automation. If you have a MacOS Workstation, the installation is as follows:
-
Start a Bash Shell
-
Install the Azure CLI
brew update && brew install azure-cliNOTE: For more detailed instructions consult the Microsoft Azure CLL Docs for macOS
-
Test Login
az login
Deploy Azure Kubernetes
Install Azure Kubernetes with Azure CLI
Azure Kubernetes Service (AKS) simplifies deploying a managed Kubernetes cluster in Azure by offloading the operational overhead to Azure. As a hosted Kubernetes service, Azure handles critical tasks, like health monitoring and maintenance. Installation is as follows:
-
Start a Bash Shell
-
Login to Azure
az login -
Create Resource Group (See Example below)
az group create -n "olympus" -l "eastus"NOTE: In this example we are creating a resource group called
olympusand using theeastusregion. -
Get latest AKS Versions available for your region (See Example below)
az aks get-versions -l "eastus" -o tableNOTE: We recommend avoiding preview releases for stability
-
Deploy AKS (See Example below)
az aks create --resource-group "olympus" --name "olympus" --node-count 4 --kubernetes-version "1.21.9" --ssh-key-value $HOME/.ssh/olympus.pub --node-vm-size "Standard_DS2_v2" --node-osdisk-size 30 --enable-managed-identityNOTE: In this example we are creating a 4 node AKS cluster called
olympusin theeastusregion with 30 Gig Disks with our SSH key calledolympus
Configure Kubectl for Azure Kubernetes
Kubectl is a command line tool used to run commands against Kubernetes clusters. It does this by authenticating with the Master Node of your cluster and making API calls to do a variety of management actions. If you’re just getting started with Kubernetes, prepare to be spending a lot of time with kubectl. Configuration for Azure Kubernetes (AKS) is as follows:
-
Start a Bash Shell
-
Login to Azure
az login -
Get AKS Credentials (See Example below)
az aks get-credentials --resource-group olympus --name olympus --file ~/.kube/config-aksNOTE: In this example we are getting credentials in Kubectl format for our k8s cluster called
olympusin the resource groupolympusand saving it in the./kube/local folder and calling the fileconfig-aks -
Configure kubectl environment variable
export KUBECONFIG=$HOME/.kube/config-aks -
Set kubectl context for AKS (See Example below)
kubectl config use-context olympus -
Test AKS Cluster Connection
 kubectl cluster-info
 kubectl get nodes -A
Configure your Projects
Configure GitHub
You will need a Github Personal Access Token (aka. PAT) to kickoff deployment processes from Azure DevOps Pipelines. You will also need to configure GitHub with your Personal SSH Key so you can pull code down to your workstation. Procedure is as follows:
-
Browse to GitHub
-
Navigate to Your Profile > Settings > Developer Settings > Personal Access Tokens
-
Press
Generate new tokenand enter the following:Field Value Note Any memorable string (e.g. myrepo)Expiration 30 days(or longer)Scope repo:* -
Safeguard your
Personal Access Token -
Navigate to Your Profile > Settings > SSH and GPG keys
-
Press
New SSK keyand enter the following:Field Value Title Any memorable string (e.g. mykey)Key Paste in YOUR PERSONAL SSH PUBLIC KEY -
Press
Add SSH Key
Configure Docker Hub
You will need a Docker Hub Access Token to kickoff deployment processes from Azure DevOps Pipelines. Procedure is as follows:
-
Browse to Docker Hub
-
Navigate to Your Profile > Account Settings > Security
-
Press
New Access Tokenand enter the following:Field Value Description Any memorable string (e.g. mytoken)Scope Read, Write, Delete -
Safeguard your
Access Token
Configure Azure DevOps Project
You can create connections from Azure Pipelines to external and remote services for executing tasks in a job. Your Azure DevOps Pipelines will need to connect to GitHub to retrieve source code and also connect to Kubernetes to deploy Docker images from Docker Hub. Procedure is as follows:
-
Sign In to Azure DevOps
-
Create a new project as follows:
Field Value Project name Any memorable name (e.g. cassandra)Visibility Public -
Navigate to Project Settings > Pipelines > Service Connections
-
Create a new service connection for GitHub as follows:
Field Value Service or connection type GitHubAuthentication method Personal Access TokenPersonal Access Token YOUR GITHUB PERSONAL ACCESS TOKEN Service connection name githubGrant access permission to all pipelines True -
Create a new service connection for Kubernetes as follows:
Field Value Service or connection type KubernetesAuthentication method Azure SubscriptionAzure Subscription YOUR AZURE SUBSCRIPTION ID Cluster YOUR AKS CLUSTER NAME (e.g. olympus)Namespace defaultUse cluster admin credentials TrueService connection name olympusGrant access permission to all pipelines True
Deploy Boutique
Fork Boutique GitHub Repository
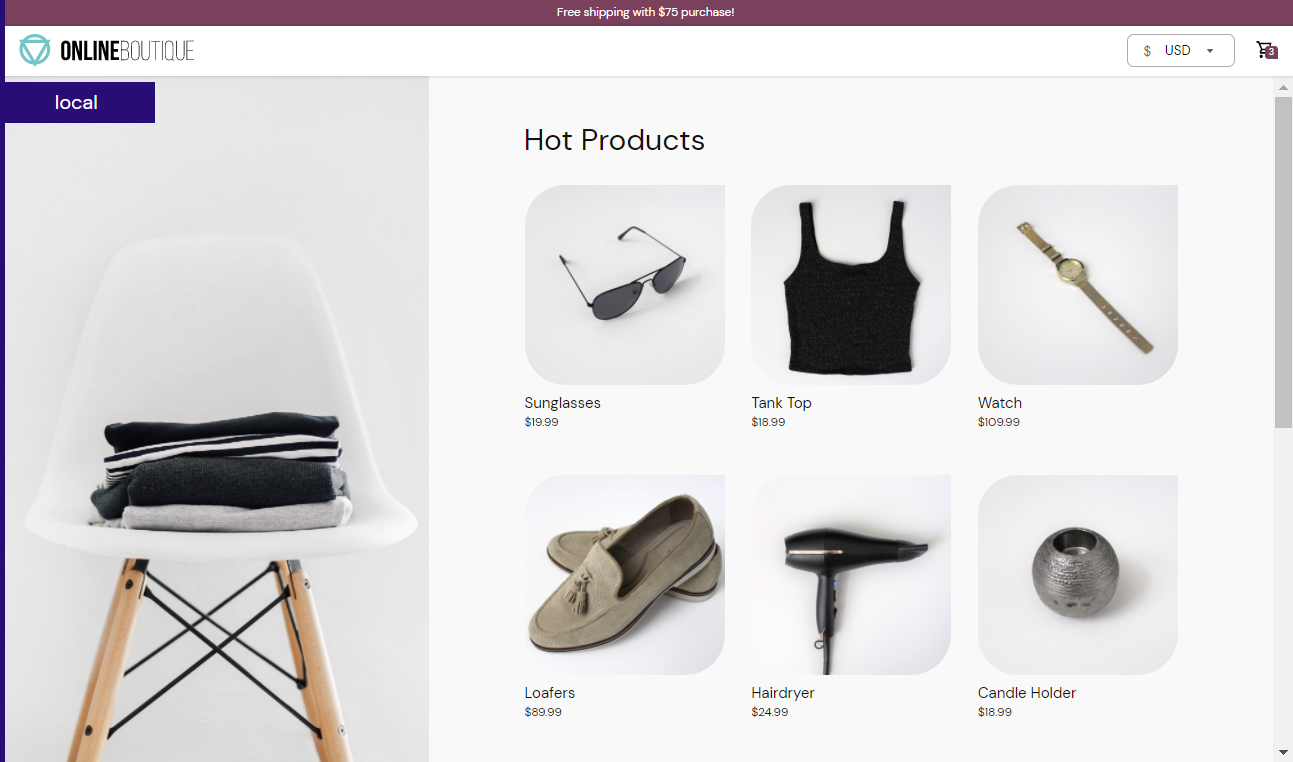
A fork is a copy of a repository so you can leverage someone else’s project as a starting point for your own ideas. Forking a repository allows you to freely experiment with changes without affecting the original upstream repository. We are leveraging Google’s Boutique application which we forked ourselves earlier under a new repository called cassandra where we customized it further for this site.
Procedure is as follows:
-
Sign In to GitHub
-
Navigate to Import Repository and enter the following:
Field Value Your old repository’s clone URL https://github.com/cloudnativenow/cassandra.git Your new repository owner YOUR GIT ACCOUNT Your new repository name Any memorable name (e.g. cassandra)Privacy Public
Builld All Boutique Images
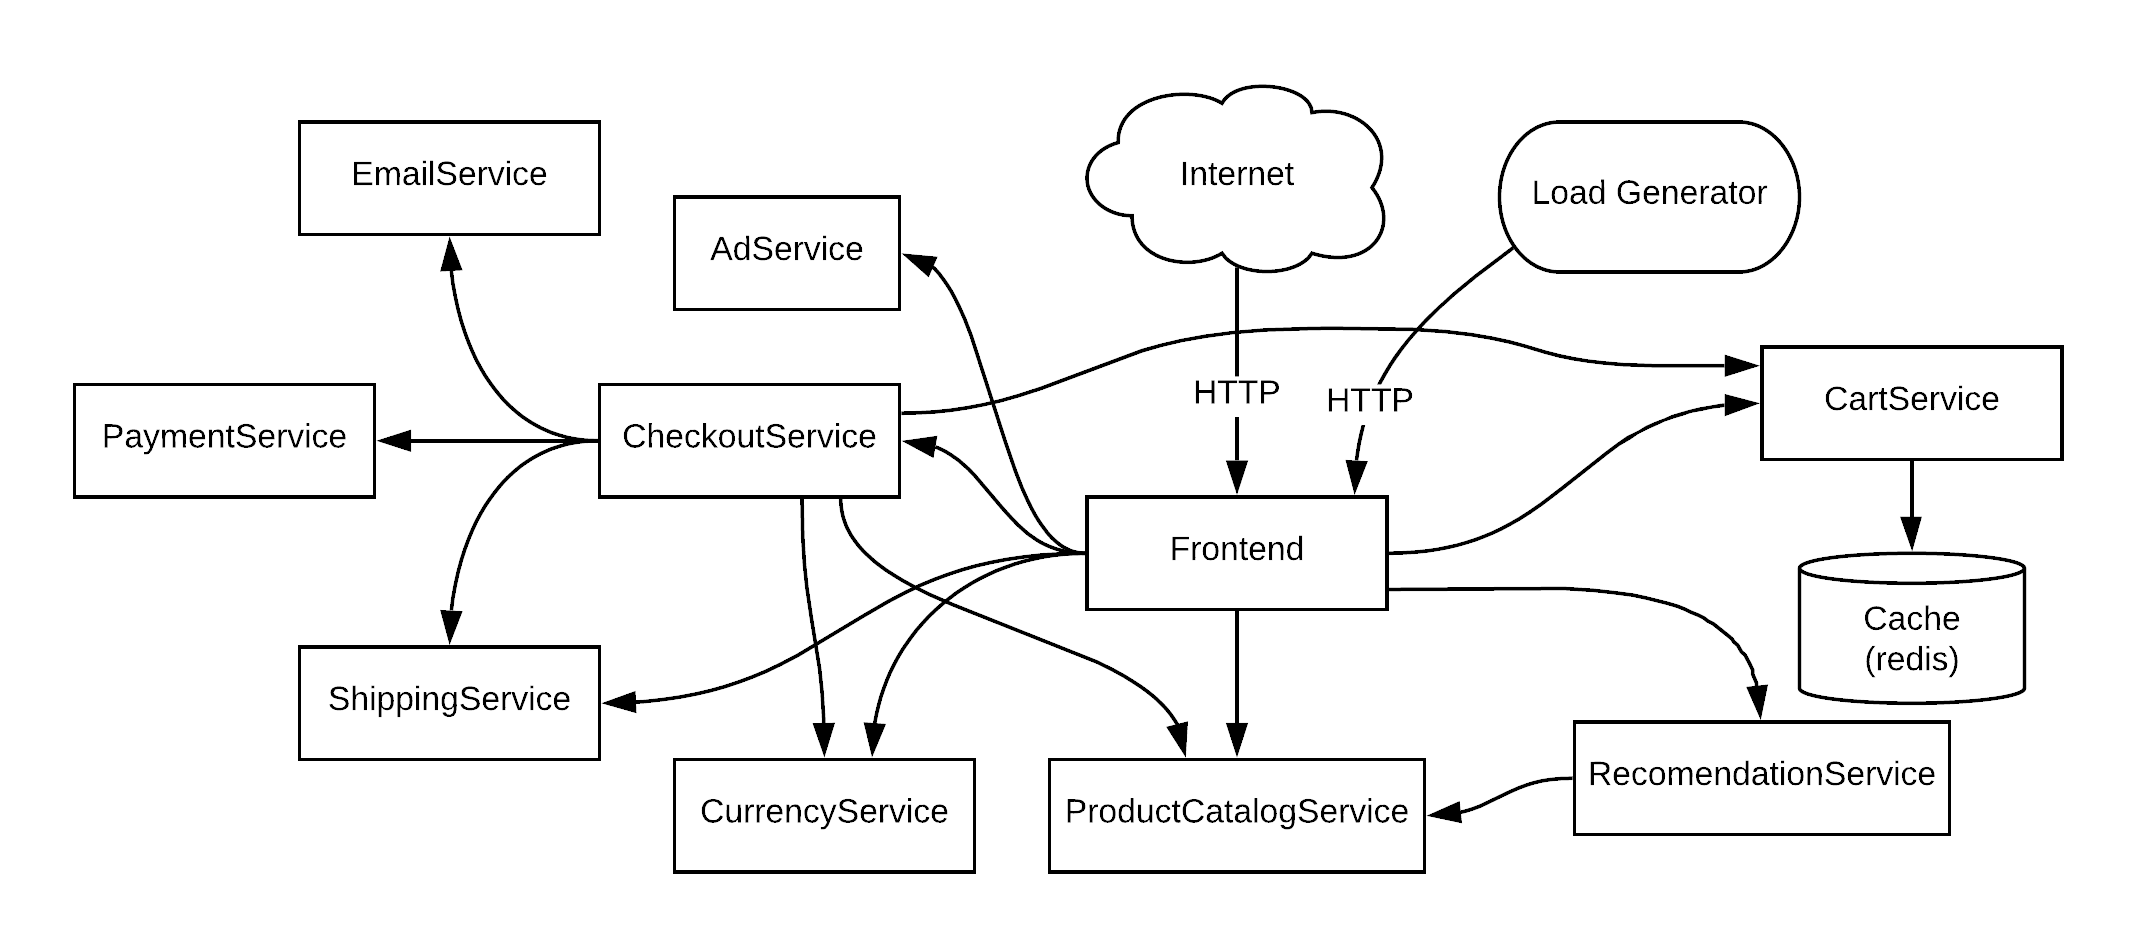
The Boutique application consists of 12 Docker Images which need to be built and pushed to your Docker Hub public registry using the provided docker-publish-all Pipeline. Procedure is as follows:
-
Sign In to Azure DevOps
-
Select the Boutique Project (e.g.
cassandra) you configured earlier. -
Navigate to
Pipelines > Alland create anazure-pipelinesfolder, if it does not exist. -
Navigate to the
azure-pipelinesfolder and pressCreate Pipeline -
For the
Where is your code?prompt, selectGitHub -
For the
Select a repositoryprompt, select your GitHub Repository. -
Press
Approve and Install -
Enter your GitHub password if prompted.
-
At the
Configure your pipelineprompt, selectExisting Azure Pipelines YAML file -
At the
Select an existing YAML fileprompt, set fields as follows:Field Value Branch mainPath /azure-pipelines/docker-publish-all.yml -
Press
Continueto review your pipeline YAML. -
Create the following Pipeline Variables:
Name Value Keep this value secret Let users override this value when running this pipeline REPO_USERNAME YOUR DOCKER HUB ID False True REPO_PAT YOUR DOCKER PAT True True REPO_PREFIX YOUR DOCKER HUB ID False True -
Using the
RunButton, selectSave Pipeline -
Rename Pipeline as follows:
Field Value Name docker-publish-allSelect folder \azure-pipelines -
Press
Run Pipeline -
Review Variables and press
Run
NOTE: Be patient, the pipeline takes at least 10 minutes to complete.
-
Monitor the Pipeline and make sure it runs successfully
-
Browse to Docker Hub to verify your images.
-
You should see 12 new Docker Images pushed under your account.
Create Boutique Application namespace
-
Start a Bash Shell
-
Configure kubectl environment variable
export KUBECONFIG=$HOME/.kube/config-aks -
Set kubectl context for AKS (See Example below)
kubectl config use-context olympus -
Create Boutique Application namespace (e.g.
cassandra)kubectl create ns cassandra
Deploy All Boutique Images using Helm Pipeline
The Boutique application consists of 12 Docker Images which need to be depoyed to your Azure Kubernetes using the provided kubernetes-deploy-all Helm Pipeline. Procedure is as follows:
-
Sign In to Azure DevOps
-
Select the Boutique Project (e.g.
cassandra) you configured earlier. -
Navigate to
Pipelines > Alland create anazure-pipelinesfolder, if it does not exist. -
Navigate to the
azure-pipelinesfolder and pressCreate Pipeline -
For the
Where is your code?prompt, selectGitHub -
For the
Select a repositoryprompt, select your GitHub Repository. -
Press
Approve and Install -
Enter your GitHub password if prompted.
-
At the
Configure your pipelineprompt, selectExisting Azure Pipelines YAML file -
At the
Select an existing YAML fileprompt, set fields as follows:Field Value Branch mainPath /azure-pipelines/kubernetes-deploy-all.yml -
Press
Continueto review your pipeline YAML. -
Create the following Pipeline Variables:
Name Value Keep this value secret Let users override this value when running this pipeline SERVICE_NAMESPACE cassandraFalse True REPO_PREFIX YOUR DOCKER HUB ID False True -
Using the
RunButton, selectSave Pipeline -
Rename Pipeline as follows:
Field Value Name kubernetes-deploy-allSelect folder \azure-pipelines -
Press
Run Pipeline -
Review parameters and press
Run
Check Boutique Deployment
After all 12 Boutique Pods have been deployed, you should check all the pod statuses. In addition, retrieve and safeguard the frontend-external service EXTERNAL-IP for your demos. Procedure is as follows:
-
Start a Bash Shell
-
Configure kubectl environment variable
export KUBECONFIG=$HOME/.kube/config-aks -
Set kubectl context for AKS (See Example below)
kubectl config use-context olympus -
Test AKS Cluster Connection
kubectl cluster-info kubectl get nodes -A -
Retrieve the
frontend-externalservice EXTERNAL-IPkubectl get service frontend-external -n cassandra -
Browse to the EXTERNAL-IP to view the Boutique Application